
Tomato season is upon us! Let’s learn how to plant a tomato. For this project, we chose a Brandywine heirloom tomato to plant into a container, but the same steps work for planting tomatoes in the ground in a garden bed.
Step 1: Choose the right container so your tomato can grow & thrive
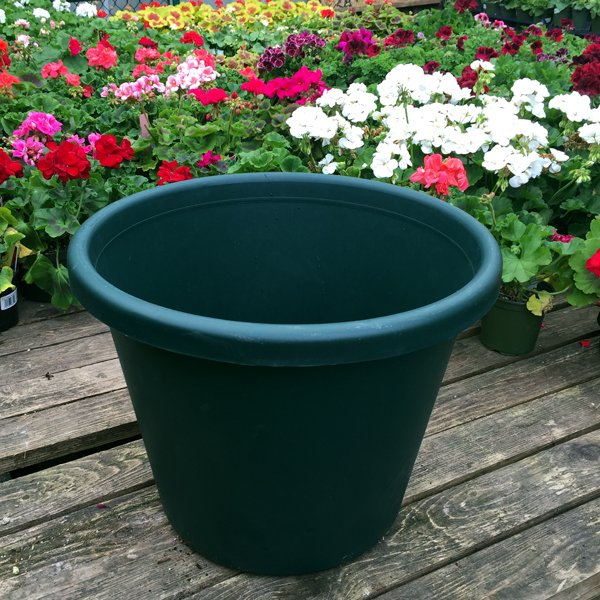
Tomatoes need space, the more the better. Choose a container that is at least 12" deep, but even larger - up to 20"-22” - will help you produce healthier plants and more tomatoes.
Myth: Cherry tomato plants need less space than plants with larger tomatoes
The type of tomato the plant produces (cherry, plum, heirloom, etc.) does not affect how much space it needs. Sungold, one of our favorite cherry tomatoes, is a monster that has a large root system and grows rapidly. If you only have room for a smaller pot, choose a variety of tomato bred specifically to stay smaller, such as a "patio," “tumbling,” or "basket" variety.
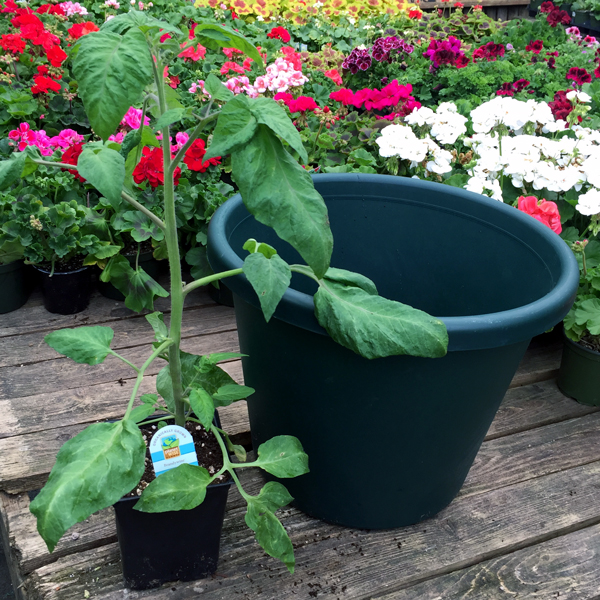
Step 2: Trim off the lower leaves of your tomato
The deeper you plant a tomato, the stronger the root system will develop. We recommend snipping off the branches of the lower third to half of the tomato, always leaving at least 3-4 top branches intact.
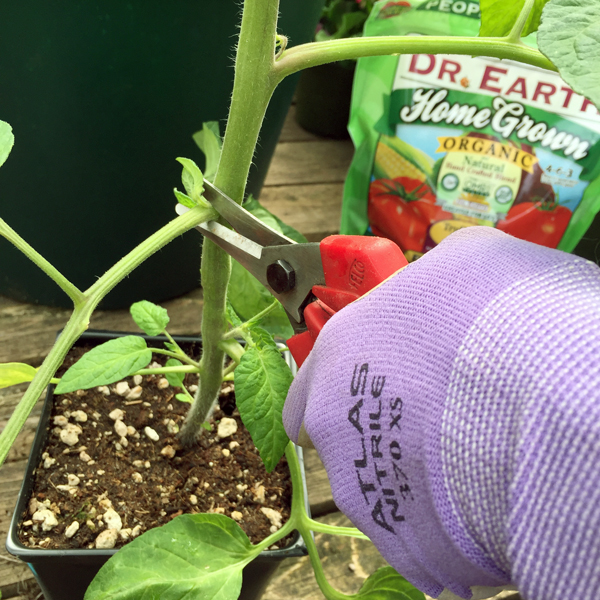
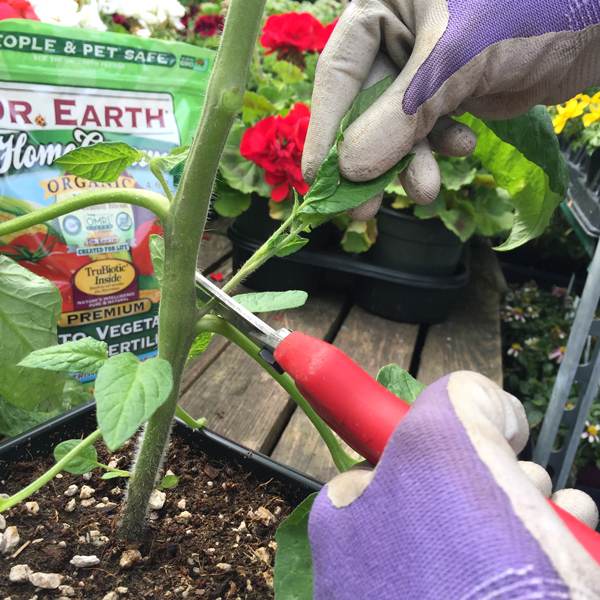
Myth: Tomatoes never need to be pruned
Pruning your tomato increases air circulation, which can help keep disease away. Throughout the season, trim any shoots that sprout on the diagonal from between the main stem and a branch (see photo above, right). This will help the plant put its energy into producing fewer, but stronger branches for fruit production. Occasionally thinning of older, non-fruiting branches will allow more air and sunlight to reach the whole plant.
You can also prune off any blossoms that remain in late summer when you know there isn't time for them to ripen before the end of the season. This can be hard to do (remove potential tomatoes??) but this will help the existing tomatoes grow and ripen.
Step 3: Prep your container
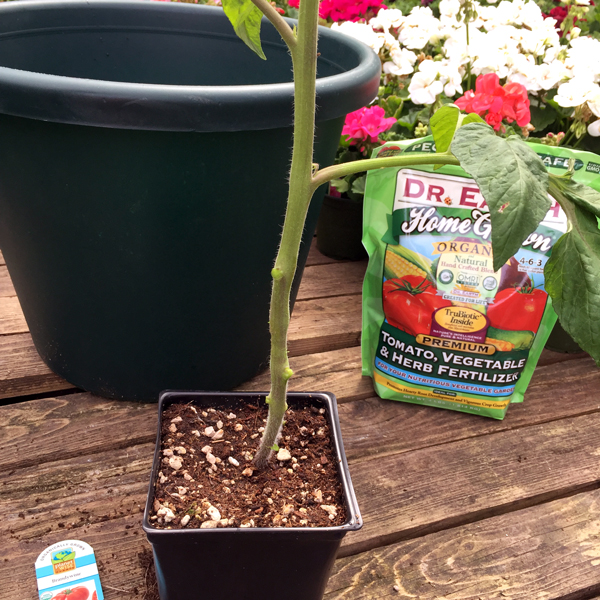
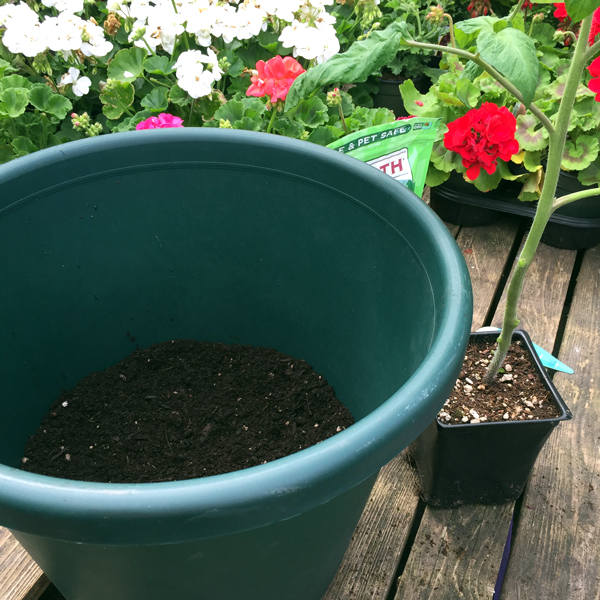
Fill your pot partway with potting soil so that when the tomato is placed in the pot, the lowest branch is about 1" above the rim. Next, mix in some high-quality organic fertilizer into the soil. Always read the package directions to see how much fertilizer to apply. We used E.B. Stone Organics "Edna's Best" Potting Soil and Dr. Earth "Home Grown" Tomato Vegetable and Herb Fertilizer for this project.
Myth: I can fill my pots with soil from the garden or with compost
Never use garden soil to fill a container. Potting soil is specially formulated to enhance root development and provide excellent drainage without becoming compacted. Compost is also not well-suited for container gardening because it is too rich and can burn plant roots. Learn more about soils and amendments here.
Step 4: Prepare your tomato for planting
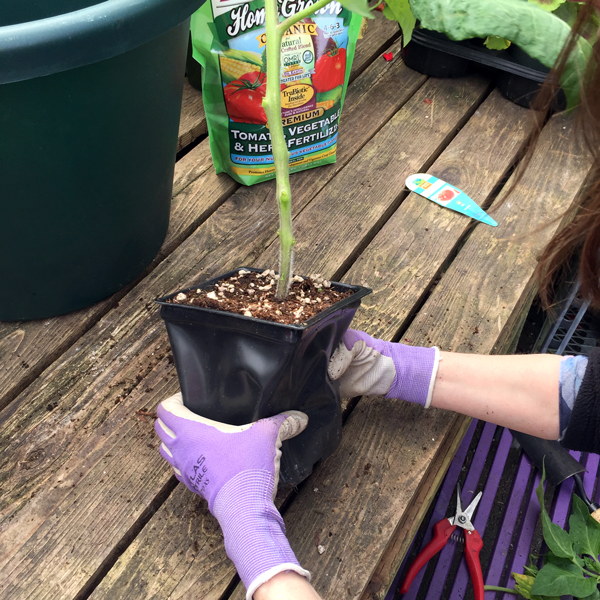
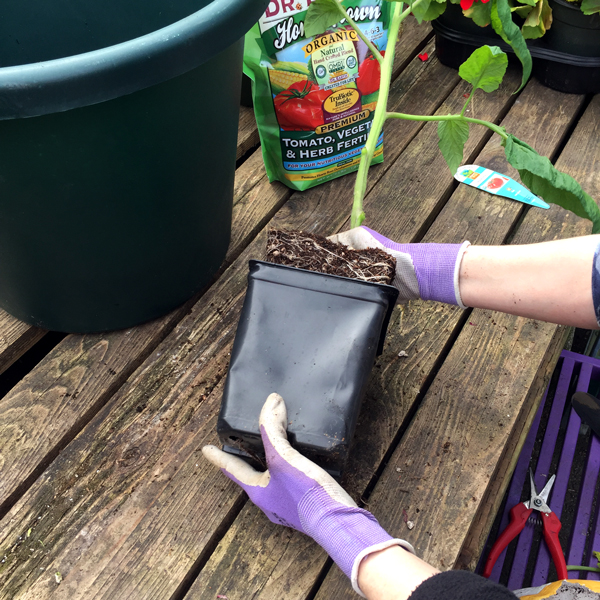
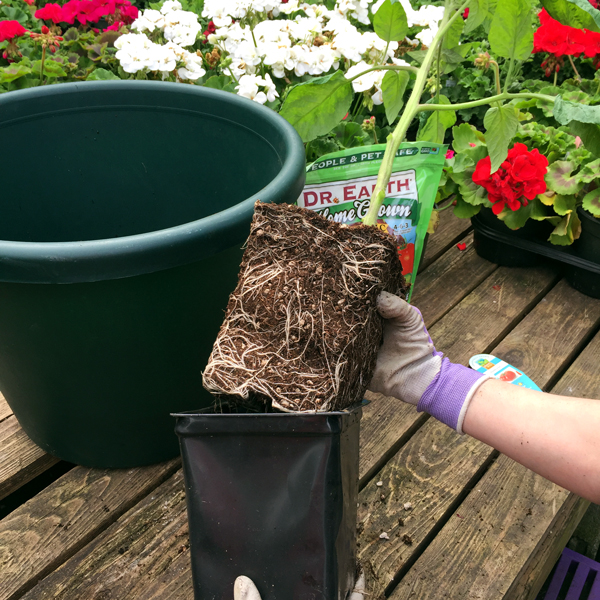
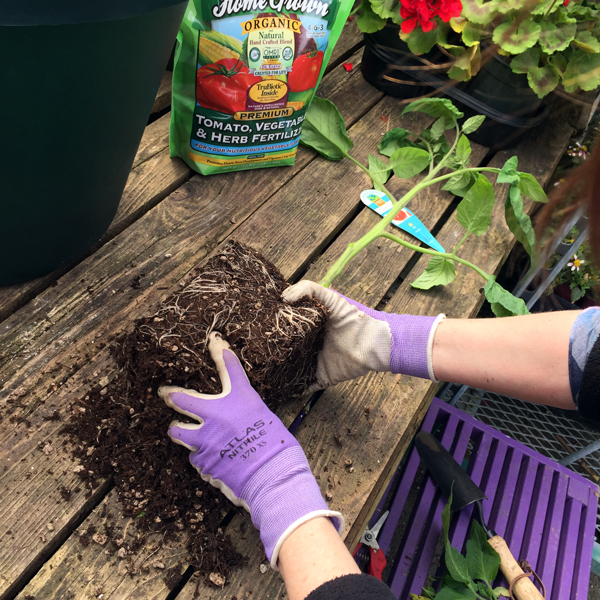
Lightly squeeze the pot to loosen the plant and then carefully remove it. As you can see in the third photo, the roots of this tomato plant have begun to circle the bottom of the pot. Gently massage the roots to detangle them and remove any lower portions that are coiled and thick.
Step 5: Plant & water your tomato
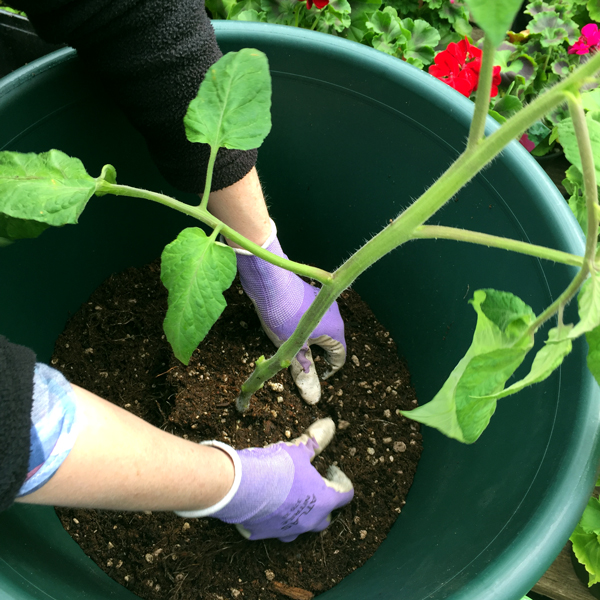
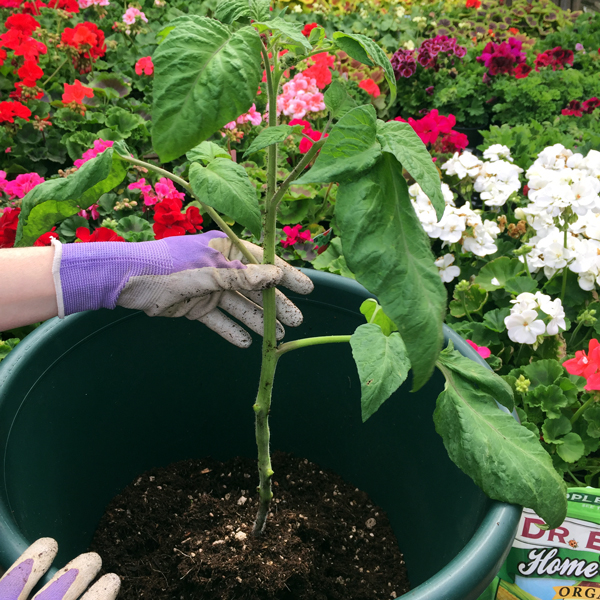
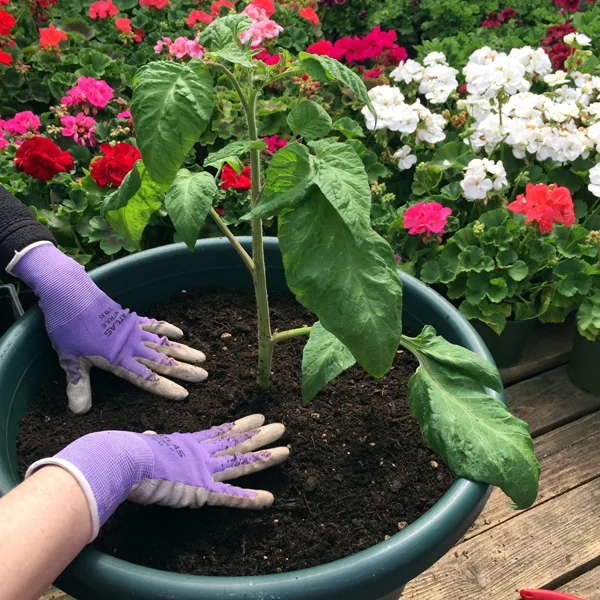
Carefully place your tomato in the pot, holding onto the root ball and stem rather than just the stem. Hold the stem straight as you add soil. When you have filled the pot, gently pat down the soil.
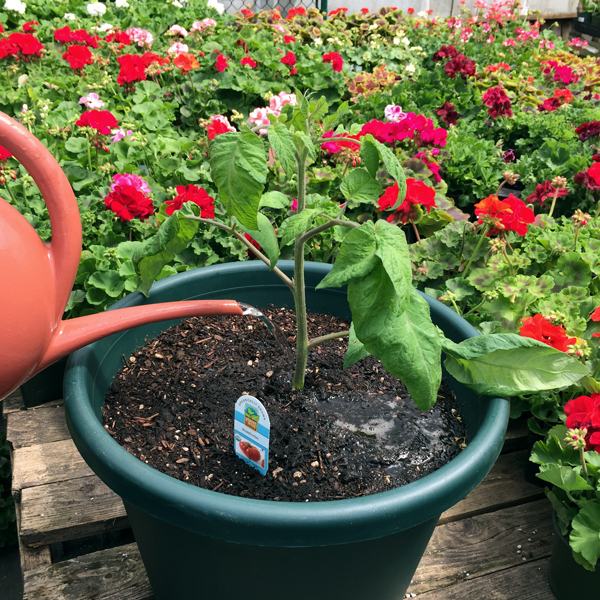
After planting, be sure to water your tomato well. Throughout the life of the tomato, water thoroughly (until water begins to run out of the bottom of the pot), waiting until the top 1"-2" have dried out before watering again.
Tomato plants like a consistent, regular watering schedule, which can also help keep tomatoes from splitting while ripening. When watering, try to avoid getting water on the leaves!
Step 6: Support and protect your tomato
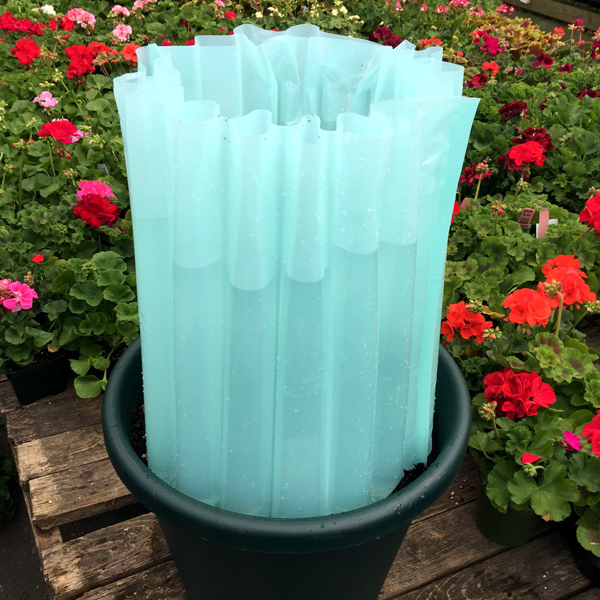
While tomatoes are more cold-hardy than squash and peppers, their health can be severely damaged by the cold nights (and sometimes days!) of a Pacific Northwest spring. Without protection, they should not be planted outdoors until night temperatures stay about 50 degrees. However, you can plant your tomatoes earlier in the spring if you offer them protection from the cold. This gives them the extra time they need to mature and produce fruit in our short Northwest summers.
We recommend protecting your tomato with an insulated plant protector, a blue plastic "tent" of sorts. Fill the tubes of the Season Starter with water, which warms during the day and insulates the plant at night. Once the weather warms and nights stay in the mid-50s, you can gently roll down the starter, releasing the water. It can stay rolled up at the base of the tomato plant all season.
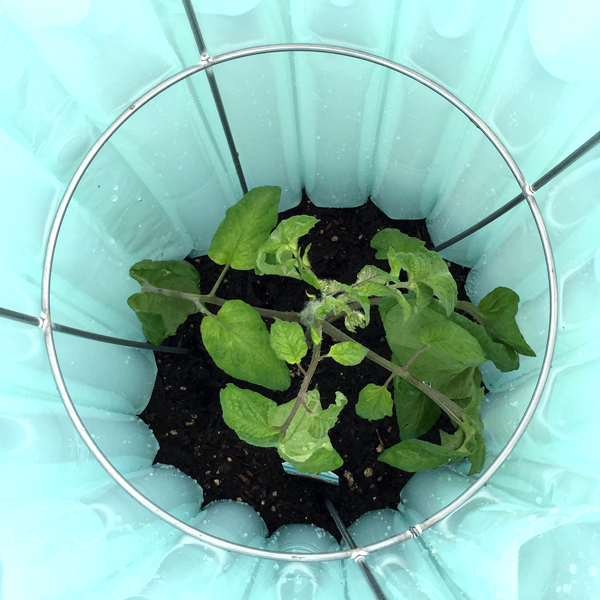
Myth: Tomatoes don't need any support
A tomato plant needs support as it grows and especially when its branches are carrying loads of heavy tomatoes! A sturdy cage will protect the branches and keep them from breaking. It's best to put the cage over the tomato plant when it is young. Otherwise, you risk damaging the leaves and branches. Slide the cage into the soil and inside the Season Starter.
Voilà! You now have happy tomato plants ready to provide a bumper crop of delicious home-grown tomatoes!
Learn more about caring for tomatoes and other warm-season vegetables.
Blog updated for 2024!